Reviewing Applications
Reviewing Applications
Evaluate applications, coordinate with your review team, make decisions, and notify applicants.
The Applications page
Open the Applications tab from your organization dashboard. You'll land in a two-column layout: opportunities on the left, the applications table on the right.
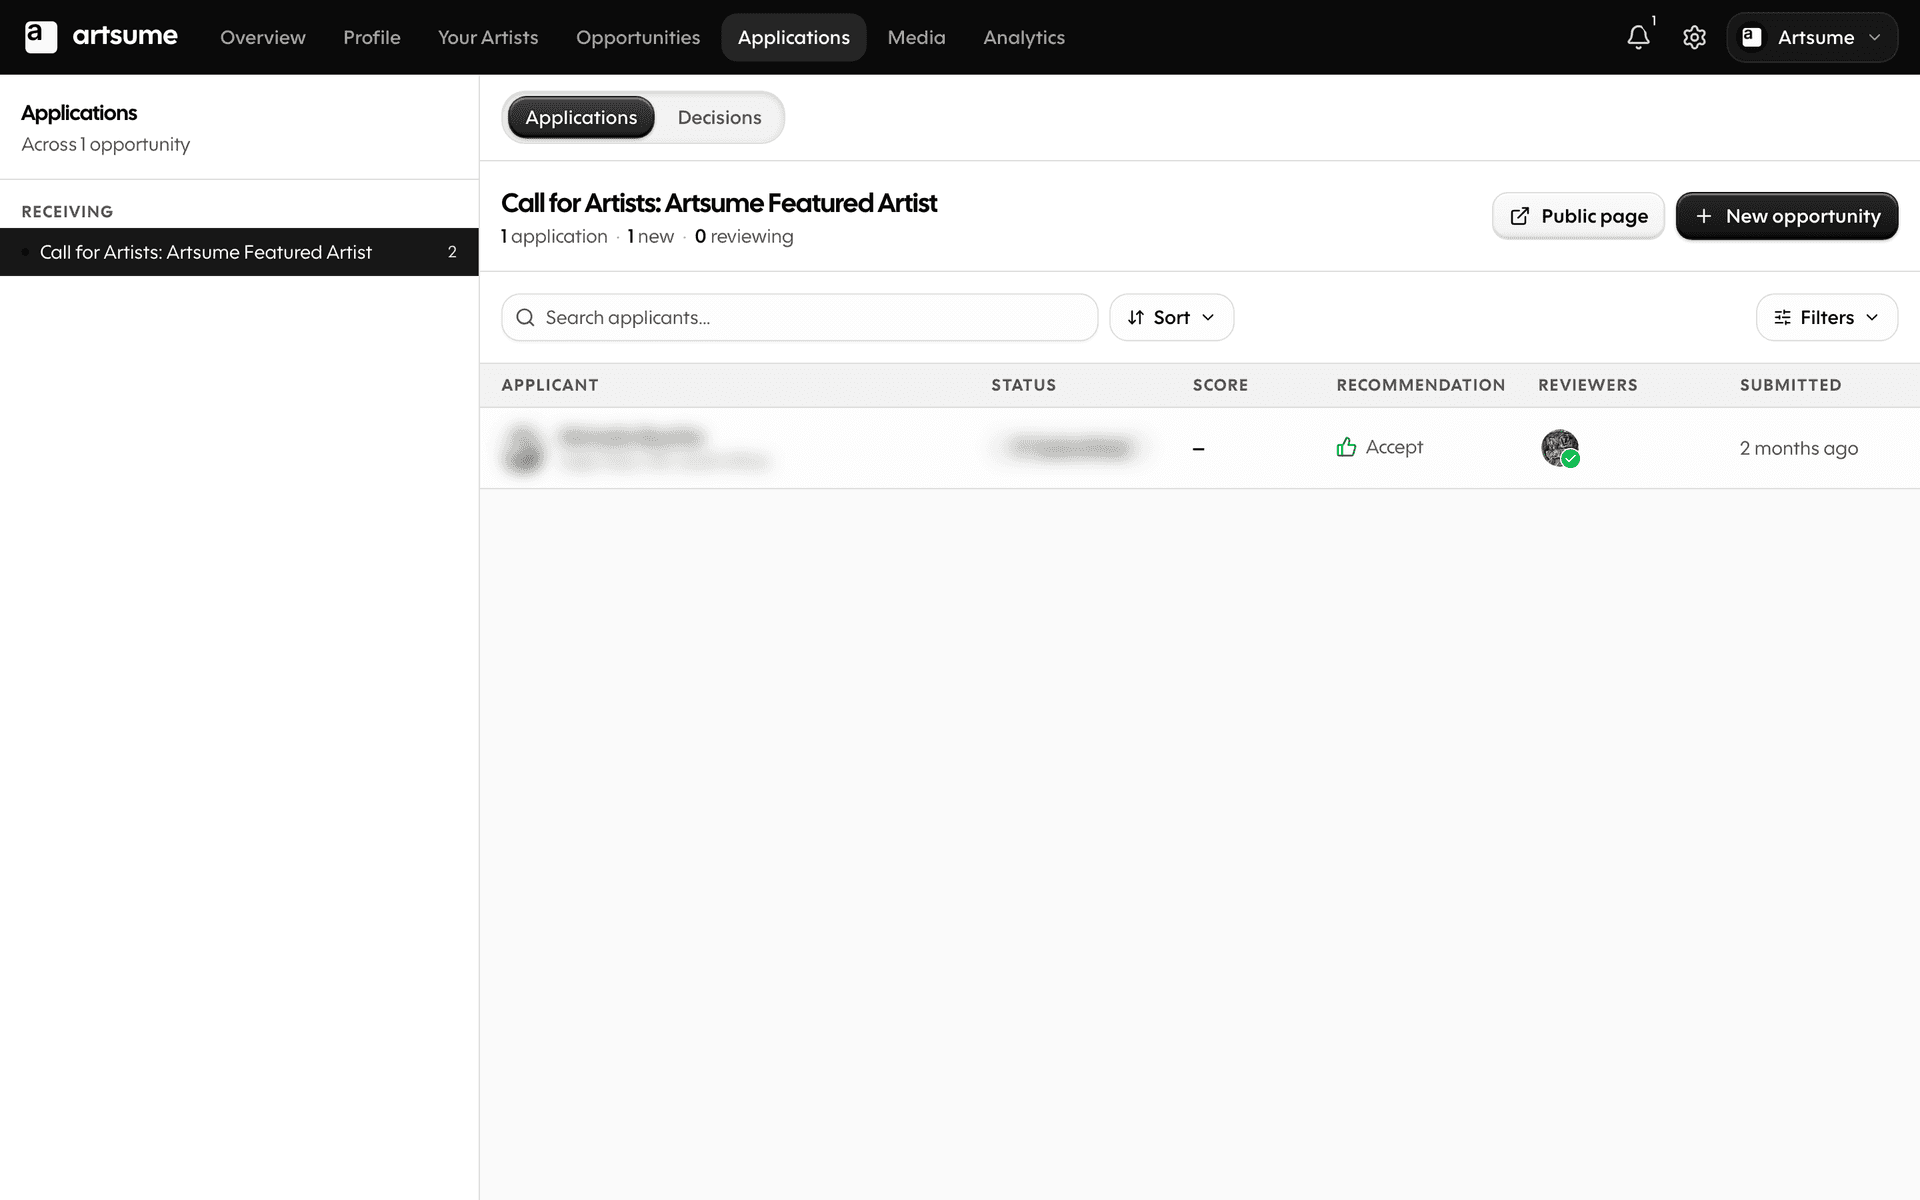
Pick an opportunity from the rail to see its applications. The table shows everything in one view: applicant, status, score (if scoring has started), submission date, and reviewer assignments.
Filter and sort using the controls above the table:
- Status (new, in review, shortlisted, accepted, rejected)
- Score
- Reviewer assignment
- Submission date
Sort by clicking the chips above the table — they show your current sort at a glance.
Review an application
Click an application to open the review workspace — a three-column layout:
- The queue rail on the left shows every application for this opportunity in your current sort order. Click any one to jump to it without losing your place.
- The applicant is in the middle: their answers, portfolio works, CV, statement, and contact card on one continuous canvas.
- The review panel is on the right: scoring controls, recommendation chips, your notes, and the activity timeline.
Click Next at the bottom of the review panel to score the next applicant in your queue — your filters stay applied and the rail stays put.
On mobile, the workspace takes over the screen. Use the queue sheet to jump between applicants and the score peek sheet to score without scrolling away from the applicant.
Score applications
Artsume supports three scoring modes — your opportunity's review settings determines which one reviewers see.
Recommendation
- Pick "Yes / Maybe / No" from a row of icon chips
- Best for fast triage or single-pass review
Sliding scale
- A single overall score from low to high
- Best when you want a clean ranking without per-criterion detail
Rubric
- Score each criterion in your rubric, weighted as you set it up
- Best for funded grants, awards, and any review where you need defensible scoring
To score:
- Open an application
- Use the scoring panel on the right (or the score peek sheet on mobile)
- Score against your mode
- Add notes explaining your reasoning
- Click Next to move to the next applicant — saving happens automatically
If multiple reviewers score, Artsume calculates averages and shows you the spread.
Scoring tips
- Score against your criteria, not against other applications
- Use the full range of your scale
- Add notes. You'll forget why you gave that score later
- Be consistent across applications
Assign reviewers
Distribute applications among your team:
Manual assignment:
- Go to the applications list
- Select applications to assign
- Choose reviewer(s)
- Assign
Automatic assignment:
- Set up rules to distribute applications evenly
- Useful for large applicant pools
Reviewers only see applications assigned to them (unless you grant broader access).
Blind review
For impartial evaluation:
- Enable blind review in opportunity settings
- Reviewer names are hidden from applicants
- Optional: Hide applicant names from reviewers
Blind review reduces bias but may not work for all opportunity types.
Make decisions
After review:
Shortlist:
- Mark top applications as shortlisted
- Request additional materials if needed
- Schedule interviews if applicable
Accept:
- Change status to Accepted
- Prepare acceptance communications
- Set up next steps (contracts, payments, logistics)
Reject:
- Change status to Not Selected
- Prepare rejection communications
Decision batches
Make decisions in batches rather than one at a time. This helps ensure consistency across your applicant pool.
Communicate with applicants
Send notifications to applicants:
Bulk notifications:
- Select multiple applications
- Choose notification type (acceptance, rejection, request for materials)
- Customize message
- Send
Individual messages:
- Open specific application
- Send direct message
- Track communication history
All communications are logged in the application record.
Export data
Export application data for:
- External review panels
- Record keeping
- Reporting
Export formats: CSV, PDF, or custom reports.
Review workflow example
- Deadline passes: Applications close
- Initial screening: Staff checks eligibility, completeness
- Assign reviewers: Distribute to review panel
- Scoring period: Reviewers score and comment
- Discussion: Team meets to discuss top applications
- Decisions: Accept, waitlist, or reject
- Notifications: Inform all applicants
- Archive: Close opportunity cycle
Frequently Asked Questions
What's next
- Team Collaboration: Coordinate with your review team
- Creating Opportunities: Set up your next opportunity
Topics
Related Tutorials
Affiliated Artists
Manage the artists connected to your organization: verify CV claims, handle disputes, and track the lifecycle of every association.
Best Practices
Best practices for artists and organizations on Artsume: profile optimization, portfolio presentation, application strategies, and review processes.
Creating Your Profile
Build your Artsume artist profile: handle, disciplines, statement, visibility, and images. Step-by-step setup guide.